Search on this web:
Custom Search

Sunday, May 1, 2011

Studio Acoustics and Soundproofing Basics


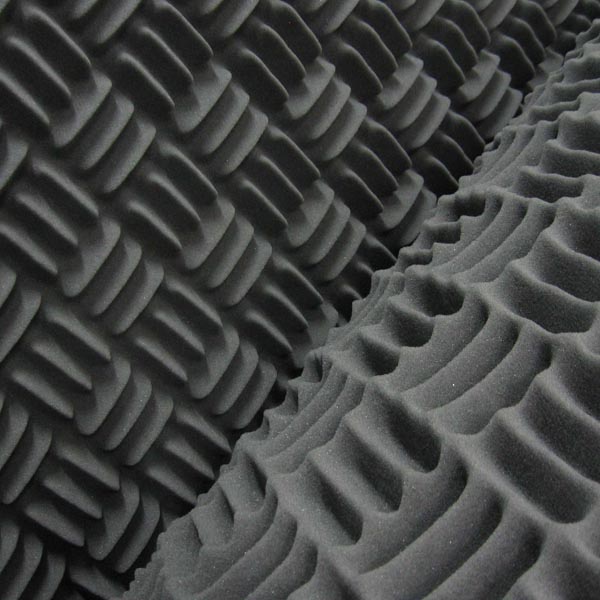
Sonex 600 Foam Squares
Sonex 600 Acoustic Foam
The science of acoustics is something that tends to alternately baffle and intimidate most of us. Outside of a handful of highly trained individuals, the aspects of what makes a room sound a certain way is looked upon as a sort of black art. Performance venues and upscale recording studios routinely include acoustic designers in their construction budgets, spending considerable sums of money in pursuit of sonic perfection.
But for the average musician, budgeting for acoustic treatment has traditionally ranked well below the more tangible fun stuff like instruments, mics, recording gear, plug-ins, toys and more toys. Even if you’re at liberty to physically alter your space without incurring a landlord’s wrath, budgeting for two-by-fours, sheetrock and caulking doesn’t tend to hold the same appeal as that new channel strip plug-in or twelve-string you’ve been pining for.
Fortunately, the same technological revolution that has brought multitracking into spare bedrooms and one-car garages has also created low-cost solutions for many of the common acoustical issues facing the average project studio. In this month’s Studio Basics we’ll look at some ideas to smooth out your sonic nightmares.

Just Scratching the Surfaces

Let’s start off with a disclaimer: the purpose of this article is not to give you an education on acoustics. There are plenty of authoritative books on the subject, among them F. Alton Everest’s classic “How to Build a Small Budget Recording Studio from Scratch,” as well as a wealth of great articles and web posts. Rather, our goal here is to talk about some of the most common issues we encounter in our musical spaces, and some of the means available to address them.

That said, let’s divide the concept of acoustic treatment into some basic categories. There’s insulation, which usually entails keeping the sounds of the outside world out, or keeping your own sounds in. Closely related is isolation – the art of keeping individual sounds from bleeding too heavily into each other.

The other challenge is a bit more subtle, and has to do with how our rooms affect the sounds we’re creating in them. In any given space, the characteristics of that space have a direct effect on what we’re hearing. That’s why an instrument will sound different in a large hall than it will in a small club. It’s also the reason your mix sounds so different in your home studio than it does when you’re squirming in your chair in that A&R guy’s office.

The average home studio or rehearsal space rarely does well in addressing any of these issues. Most times we’re dealing with a spare bedroom, converted garage, basement or loft, none of which boast construction aspects that are in any way conducive to good sound. Thin, parallel walls, boxy shaped rooms, low ceilings and rattling window frames are only some of the enemies we face.

Even a few short years ago, the only way to address these issues involved massive amounts of money, materials and frustration. While the ultimate solution is still to plan and construct a purpose-built environment from the ground up, these days there are a number of ways to markedly improve your odds of making your workspace sound better without having to sell your instruments or smash your fingers.
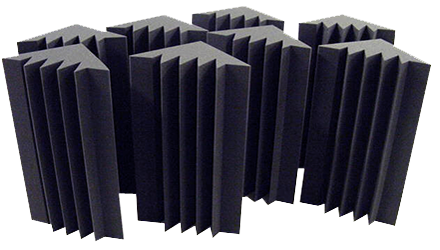
Bass Traps

Soundproofing and Insulation

One of the most frustrating aspects of sound is that it will go where it wants to, and find its way through any space via any available path. That’s why it’s so important (and so difficult) to block any potential points where sound can leak through. In all cases, mass is your friend – the thicker and more dense your walls are, the better they’ll be at stopping sound.

Even more effective is mass combined with air. The most common construction  technique is what’s known as a “floating room,” where an entirely new set of walls, floor and ceiling are built within the existing space, detached and separated by several inches from the outside walls (and, in the case of flooring, by rubberized “floaters” that lessen the transfer of vibrations). If you’re constructing your own space, there are companies that offer soundproofed doors and windows, as well as soundproof wall panels in pre-set or custom sizes.

Even if you don’t have the luxury of new construction, sealing areas of potential leakage in your existing structure will go a long way toward keeping the inside sounds in and outside out. For doors and window frames, look for the thickest, most dense weatherstripping that will fit in the allotted space. Use caulking to seal around areas like heating and air conditioning ducts, electrical outlet boxes, lighting fixtures, unfinished drywall joints and, if you’ve got them, tiled ceilings. While there are countless varieties of commercially available caulks and sealants, consider a latex sealant designed for acoustical applications.

You can also accomplish a lot by adding sound blocking layers to your existing walls. Several companies offer low-vibration materials which are exceptionally dense but surprisingly thin and lightweight.

If You Can’t Do the Whole Room…

For many of us, especially those who can eschew live drums, the toil and expense of insulating the entire room can be avoided by simply isolating only those elements that need it. In traditional studios, isolation booths have long been used to separate the vocalist or drummer during a live take. While these tend to be of the permanently-constructed variety, a number of companies offer various sizes of portable, lightweight “iso-booths” that can be assembled quickly and easily when and where you need them. Alternatively, you can search the web and find plans to build your own.

Another variation on the iso-booth that has become increasingly popular is the amplifier chamber. These can vary from small, soundproofed boxes just large enough to hold your guitar amp and a mic stand, to cabinets with speaker and mic (XLR) jack built in.

Your Biggest Fan
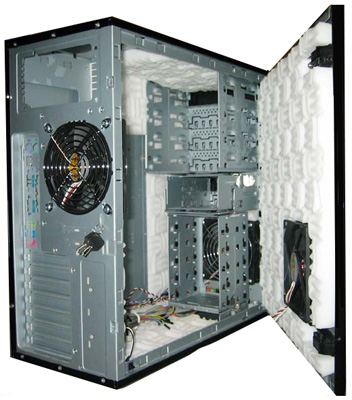
Sonex Computer Case

Your computer can be one of the biggest contributors of noise in your studio space. Particularly if your room is otherwise relatively quiet, the background hum of one or more computers can adorn your delicate acoustic tracks with all the ambience of a runway at Heathrow.

If you’re reasonably computer-savvy (or know someone who is), replacing your computer’s stock fan with a whisper-silent one is a quick way to reduce the noise. Another option is to look into sound-dampening cases with quiet cooling systems, which can knock off several decibels of noise, as well as cabinets that will completely enclose your computer’s CPU.


Semi-Isolation

In many cases, complete isolation is neither necessary nor desirable. As anyone who has ever recorded a live band will tell you, a little leakage can be a good thing, adding a natural sounding element that’s sometimes lost by separating things too much. Sometimes a bit of baffling between players and/or amps is all that’s necessary to provide enough separation for a decent recording.

This is typically accomplished with a gobo, a small portable wall panel around four or five feet tall. Many people build their own, sometimes covering one side with carpet or other absorbent material, the other with a reflective surface like parquet, and putting them on wheels for easy maneuvering. You can also find pre-manufactured versions of these, as well as transparent acrylic panels to surround the drummer but still allow for that all-important eye contact.

Fixing the Vibe

Let’s shift gears now and talk about the other major challenge in any studio: controlling the sonic characteristics of your space. Every acoustic environment’s sound is dictated by a number of factors, including the distance between walls, the height of the ceiling, the angles at which the walls meet and the materials comprising the surfaces, not to mention the composition and placement of tables, pictures and other surfaces, furniture, curtains, etc.

For the vast majority of us, our creative environments end up being places like basement rooms, garages or second bedrooms – typically smallish boxes with parallel walls. These types of spaces tend to encourage the buildup of standing waves, resonant frequencies and other sonic anomalies that can substantially color what we’re hearing, rarely for the better. The hard surface of a side or rear wall can create reflections that can significantly change the sound of your mix.

Step One – Identify the Problem

Many of today’s software programs offer tools to help identify some of the most common issues. Spectral analyzers, also known as Real Time Audio meters (RTA’s), are basically meters that break the sound down by various frequency groups, and can tell you a lot about what your room is (or isn’t) doing to your mix. By using a reasonably sensitive microphone in various spots throughout the room, an RTA can help to identify areas where there’s an excess buildup of certain frequencies. Some audio software applications have RTA’s built into the program. You can also get dedicated software or hardware units that can perform the same function.

One important caveat here: meters can be invaluable when used correctly, but meters don’t mix music – your ears do. Trust your ears first and foremost. Listen and compare, then use the meters to verify what you’re hearing.

Stop and Reflect 

Generally, your best defense against unwanted reflections is to attack problem areas with a combination of absorption and diffusion. Absorptive materials prevent or greatly reduce reflection, while diffusers break up the reflection, scattering the waves in a multitude of different directions and greatly lessening their impact.
Bass Bin
Bass Bin Trap
Much can be accomplished using common sense and everyday materials. The rear wall of my office/project room has a large, floor-to-ceiling bookshelf, fully stocked. Heavy carpeting and thick, theater-style curtains also work well, and you’d be surprised at the difference a strategically placed overstuffed sofa can make. But a number of commercial (and slightly less unwieldy) products are also available, including acoustic foams, fiberglass panels and blankets.

Also available are a number of diffuser products – geometrically-shaped panels and materials that, attached to your flat surfaces at strategic locations, can go a long way toward breaking up and eliminating reflections. And a number of companies offer products created of dense, uneven materials that will both absorb and diffuse sound waves, giving you the best of both worlds.

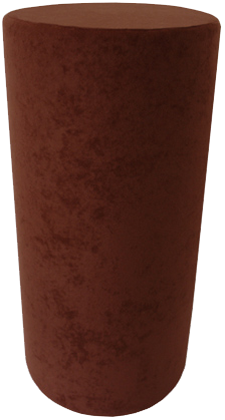
Bass traps, also known as barrel diffusers, are another popular means of addressing specific areas of your environment. Their typically cylindrical shape and uneven, absorptive finish work wonders to break up reflections in problem areas of your room. I’ve seen people construct these from plastic trash cans, though less inelegant versions are available commercially. Many companies offer bass traps that also perform as speaker stands, studio furniture, and even entire modular environments.

Conclusion

As I mentioned at the top of this article, the science of acoustics can be wide-ranging and confusing. While we know a lot about how sound behaves and what to expect out of a given space, there are always enough variables to keep it interesting. A new instrument, more bodies in the room, even changes in the weather….everything can influence the way things sound. What works for one situation may not be ideal for another, and the best we can do is to try and create as neutral and objective a listening environment as possible. Arm yourself with good monitors, meters and spectral analyzers, identify and correct obvious problem areas, and listen to as many different types of music, mixes and instruments as you can. But at the end of the day the most important tools you have are your ears – if it sounds good, it probably is good.

hypersmash.com

Thursday, April 28, 2011

Noise Colours & Types

Certain noises are described by their colour, for example, the term "white noise" is common in audio production and other situations. Some of these names are official and technical, others have more loose definitions. These terms generally refer to random noise which may contain a bias towards a certain range of frequencies.

Black Noise A term with numerous conflicting definitions, but most commonly refers to silence with occasional spikes.

Blue Noise Contains more energy as the frequency increases.

Brown Noise Mimics the signal noise produced by brownian motion.

Gray Noise Similar to white noise, but has been filtered to make the sound level appear constant at all frequencies to the human ear.

Green Noise An unofficial term which can mean the mid-frequencies of white noise, or the "background noise of the world".

Orange Noise An unofficial term describing noise which has been stripped of harmonious frequencies.

Pink Noise Contains an equal sound pressure level in each octave band. Energy decreases as frequency increases.

Purple Noise Contains more energy as the frequency increases.

Red Noise An oceanographic term which describes ambient underwater noise from distant sources. Also another name for brown noise.

White Noise Contains an equal amount of energy in all frequency bands.

Note: Some of these definitions refer to "all frequencies". This is only theoretical — in practice this means "all frequencies in a finite range".

Wednesday, April 27, 2011

Best & most popular (DAW) Digital Audio Workstation Software of 2011

This could not have been very difficult as you can simply ask this question in the top recording forums or even start a poll/survey. But potential problem could be that forum users can be paid by the software company to promote their products by answering polls and post in forums. Bear in mind those users in the home recording/audio forums are not true representative of the entire DAW user population so the result are not entirely accurate.

Therefore, to find out the reality aside from doing a survey/polls/asking a question is to get it from the most reliable data source – Google trends and searches tool. Google Inc. takes care in providing the most accurate data as possible. The results are also worldwide so it’s pretty a good representative of the entire DAW user population.

The first thing I did is to list all the known DAW commercial software available in the market. I came up with these lists:

1.) Ableton Live
2.) Acid Pro
3.) Adobe Audition
4.) Apple Garageband
5.) Apple Logic
6.) Cakewalk Sonar
7.) Cockos Reaper
8.) Cubase
9.) FL Studio
10.) Magix Samplitude
11.) Magix Sequoia
12.) Mixcraft
13.) Nuendo
14.) Pro Tools
15.) Propellerhead Reason
16.) Reaper Cockos
17.) Sony Sound Forge

The next thing is to get their search volume in Google using this tool:
https://adwords.google.com/select/KeywordToolExternal.

This shows how many users are actually looking for this DAW in Google search engine. This is a monthly figure and the higher this number, the more popular is the DAW. Below is the result:


It’s surprising and sometimes hard to believe that FL Studio is the most popular DAW based on popularity by search volume. It overtakes Cubase, Adobe Audition and Ableton Live in terms of popularity. Personally, I didn’t expect FL Studio to be this popular. I don’t know exactly the reason. Maybe it’s due to its price, features, ease of use and popularity among hip hop producers which of course one of most popular type of music genre today. I always thought either Cubase or Pro tools command the DAW popularity because they already been there in the business for some time already. And also take note that Pro tools have been regarded as the industry standard in DAW (http://bit.ly/hgZutw). The above data also shows that the top 5 DAW hold approximately 80% of what the users are looking for (see the cumulative column).

So what happens basically in the past 7 years? How did this came to happen? You can take a look at the details by using Google trends: http://www.google.com/trends. Let’s plot and analyze the trend of the top 5 performing DAW (FL Studio, Cubase, Adobe Audition, Pro tools and Ableton Live):


Based on the data it clearly reveals that in the year 2004 to 2009, Cubase holds the DAW overall popularity and is the choice for most users. FL Studio at the time (in 2004) is still in the bottom of top 5. Protools and Cubase did hold a significant share in the popularity in year 2004 to 2009. But things happen really slowly, FL Studio continuously becoming popular starting in the year 2005 until now (as shown by the increasing popularity trend.).

Adobe Audition and Ableton Live has similar share in the user’s popularity. Sad to take note that Cubase popularity went down significantly in the last 7 years and it was overtaken by FL Studio and Protools sometime in the year 2010.

Conclusion and Recommendations: Does being popular also means it’s the best? It’s not true at all times. But another question is why FL Studio became so very popular? Why did Cubase popularity went down significantly in the last 7 years only to be overtaken by FL Studio? Some might answer because the price is lower which means it is very affordable. Some might answer because it is relatively easy to use and some will say they have great documentation and manuals as well as community support. Some will also testify that the features are complete for the very low price they paid (best bang for your buck). Or some users might also answer that FL Studio is a very light program and take very little amount of system resources to operate. Does this imply that FL Studio is now the best DAW software? You decide. Wait; let’s see what will happen in the next couple of years.

Tuesday, April 26, 2011

7 Common Recording Mistakes in Pro Home-based Music Production to Avoid

MISTAKE #1: Using onboard sound card when recording music to your computer

Onboard soundcard has lot of limitations that could prevent you from creating high quality recordings. It is because they have very low signal to noise ratio it means that the noise created will be substantial over the recordings. The second primary reason is that onboard card will not allow you to record at highest sampling rate/bit depth as possible which is crucial for professional sound recordings. Most onboard cards only support 16-bit/44.1Khz or 48Khz which is not optimum or recommended. The last reason is that they have limited connectivity; onboard card is designed not for professional music productions but for other less audio-intensive apps like gaming and chatting. So if you need to record two instruments simultaneously, you just can’t. Much worse if you are tracking/recording drums :) Instead; invest in high quality audio interfaces such as Tascam US1641 USB 2.0 Audio and MIDI interface


In this case, you really do not need a soundcard or an outboard audio mixer. All you need is an audio interface and connect it to your computer using USB 2.0 technology. They accept several inputs and is ideal for recording several instruments at once which includes drums. These audio interface cost around $300 dollars, so if you are on the very tight budget and plans to use a soundcard. You can start with M-audio Audiophile 2496 which allows recording at 24-bit/96Khz format and only cost $95.

MISTAKE #2: Using Computer/Laptop multimedia speakers for monitoring audio.

These speakers are not designed for professional audio monitoring. They do not have flat frequency response. As a result, you won’t be able to monitor the details and assess the quality of your recordings objectively. Common multimedia speakers such as Creative, Altec, etc are designed for gaming applications and not suited for serious music production. One of my most favorite entry level professional studio monitor is Yamaha HS80M Studio Reference Monitor:


Reference monitors allows you to assess the quality of your recordings accurately because they have a flatter frequency response compared to speakers designed for other applications. These are “powered” studio monitors under $500 and they have exceptionally flat frequency response.

MISTAKE #3: Not doing pre-production or recording production plan

If you are aiming to produce the best sounding album as possible, crucial planning is needed. You need to examine what musical instruments or instrumentation is needed to be added to the song to make it sound great. Test things in advance before recording the tracks. In this case, do some pre-production runs, let the band perform and experiment with different arrangements to decide what is good or not.

Then you make a plan and write it on a paper. Sequence your multitrack project in advance, so you will decide how many guitar tracks you need to record. How many vocal takes, back up vocal is needed. Or whether you need to hire violinist to fit the song, etc. Once you have completed that solid plan, then start the recording sesssion.

MISTAKE #4: Recording and Mixing in UN-treated room acoustics

Your room that you are recording or mixing has a HUGE impact on the results of your music production. In this case, you need to treat your room properly so that it won’t unncesssary bounce sound waves that could bias your mixing/recording decisions. You can read this tutorial on mixing studio setup acoustic design. This is more in-depth and complete tutorial on home studio acoustics that basically covers everything you need to learn.

MISTAKE #5: Recording everything in stereo

Some tracks will only be highly necessary to be recorded in stereo (such as a solo instrument). In a multitrack project, everything should be recorded in 24bit/96Khz mono since these tracks will be mixed and then summed up into a two-channel (left and right) signal known as stereo mixdown.

The file sizes are also less compared to a stereo signal. You can read this post on the advantages of recording mono compared to stereo.

MISTAKE #6: Do not have a “trained” ear

If you are working in a studio both as an engineer or a producer, it is a requirement that you have “trained” ear. Your ear is the most powerful studio equipment. This means you can spot out of tune recordings easily, perceive minor changes in volume level, changes in tempo, pitch, noise, etc. There is no overnight success formula to have this asset. Instead you need to trained your ear on a continual basis so that you can sort out what sounds good and what sounds bad. In this case, you need to undergo ear training development exercises for recording/mixing engineers. Do not forget to monitor at reasonable level because consistent loud volume can damage your ears in the long run.

MISTAKE #7: Not recording in high resolution

A common newbie mistake is to record at 16bit/44.1Khz. This is not optimal since mixing and mastering needs digital audio sampled at much higher rate such as 24bit/96Khz for best results. It offers a much higher signal to noise ratio and your recording sounds cleaner and with depth.

Monday, April 25, 2011

Tips in Mixing Electric Guitars using "Double Tracking" Technique


One of the key elements in rock mix is thick and heavy guitar sound. One of the effective ways to accomplish this sound in the mixing process is through a technique called as “Double Tracking”. In this post I will illustrate how to double track guitars in the mix with the objective of making it heavy and thick.

Bear in mind there a lot of ways to thicken the guitar sound. Double tracking is one of the easier ways. Alternatively you can do:
  1. Compression on guitars to make it sound thick.
  2. Applying effects such as maximizer to increase loudness.
  3. Parallel compression.
If the guitar sounds thin and weak, it will tend to affect the commercial appeal of the song especially if it is being marketed as a pure rock or alternative music. It is highly essential to mix things right but…

The following are the important requirement before you can double track the guitar in the mix:
Electric guitar photos

  • The recording of the guitar should be free of noise and normalize to the maximum volume.
  • If the guitar is recorded twice, it should also be clean and normalized. But it is not required to record it twice.
  • Record with the best distortion tone you need. Do not record it yet if you are not yet convinced of the distortion tone. Much better to experiment with a live band before starting to record the guitar. The overall purpose is to have a clean and final recording ready for mixing. Remember it is not advisable to fix the distortion tone in the mix; it makes the mixing process to be complicated.
  • Double check the tuning of the guitars, even slightly out of tune guitars can be problematic since if you double tracked it will tend to worsen the out of tune guitars.

It is also highly important particularly in the recent pop rock music trend to achieve not only thick guitar sound but it is also a wide guitar sound. This will achieve the “airy” sound of the distorted guitars.

So how do we start the mix?
  1. Start with placing the 1st track in the Track one of the mixing session.
  2. Place the other guitar track in the Track two of the mixing session. If you are recording only once, just copy and paste the wav file in the Track one to Track two.
  3. Pan the Track one to -75 units (left). Depending on your recording software, this could be in %, for example if the maximum left pan setting is 100% so it will be 75/100 or 75%.
  4. Pan the Track two to 75 units (right).
  5. Now to get that wide thick sound, you can apply 5ms delay to one of the guitar (either left or right) (mix 100%)
  6. To even make it heavier, do not anymore apply reverb on any of the tracks ( it is highly important that the reverb is from the room and amp based reverb that will be realized during the recording process). It is because if you start applying reverb on the guitar, it will tend to sound weak and far. Since you are mixing for rock, it is important to get the “in your face” guitar sound.
  7. EQ it properly, do not cut too much bass in the distorted guitar, it will help add the heaviness sound.
  8. Cut 1000Hz and 800 Hz on any guitar to make sound so clean and avoid the cracking sound.
  9. Adjust the track one and track two volume and stop when it is loud enough for the guitar tracks to be heard, not dominating the vocals.
  10. Cut 3000Hz with around -6dB and Q of 1.0 for both guitar tracks.
  11. If your effects are arrange serially below are the sequence of effects that will be placed in each guitar : 
    1. a. Parametric Equalizer
    2. b. Compressor
    3. c. Reverb (optional) necessary only if the guitar tracks is too dry.
    4. d. Delay (only on one track)
It is highly important to rely on your ears to do the settings. Do not believe in holy grail settings of compressor, EQ, they are there to serve as a guide and it is important to stick with the basic principles in double tracked mixing such as above.

Friday, April 22, 2011

Using Pan, Volume and effects

You have probably noticed on your mixer there is a "pan" control on nearly every channel. No, this does not refer to the frying pan the significant other menaced you with after your last trip to the gear store. Pan is short for "pan pot". And Pan Pot is short for Panoramic Potentiometer. (A potentiometer, by the way, is a fancy word for "knob".)

Panning is critical to the makeup of your stereo image. A stereo image has two basic perspectives, left to right and front to back. Pan pots control the left and right axis. Volume, reverb, delay, filtering and ambience create the front and back.


Simple Panning Tricks for Licks

In this day of totally staggering possibilities with plugins we often forget how powerful, and critical, the pan knob is to attaining an excellent stereo image. The main thing here is to keep instruments out of the way of each other so the listener can hear them clearly. Perhaps the most obvious example of this problem is with 2 electric guitars, particularly if distortion is used. Even using one will fill the audio bandwidth significantly, but two turns it quickly into a metal junkyard of cacophony. It will help immeasurably to pan these two so they are out of each other's way. Also make them take turns sometimes. But you'll see, if you try this, that panning about 30% will really help things.

The Image of the Band

Pretend you are in the audience. Where's the keyboard player? Always on the right. Or extreme left and right if there are two of them. The Drummer? Dead center. The Guitarists are usually at 10 and 2 o'clock, and the vocalist is dead center, in front of the drummer. Of course you have seen that a million and a half times. So set up your classic rock mix with that as a guide. Center the kick and snare, let the cymbals go a little to the side. If their is a conga player, put them on the left end. Use the pan controls to bring a focus to the perspective from the audience.

Front and Back

It may seem obvious, but we need to say it anyway. Instruments that we perceive to be closer are louder and have more of a direct, rather than reflected, sound. The elements of the mix that are important are up front and we hear them most clearly. Those in the back may have more early reflections infused into the main sound of the instrument. In your mix, you might create a reverb just for these early reflections that is separate from the main, hall reverb. Why is that? Consider being at a concert hall. The loud elements may bounce off the back wall and ceiling even though they are up front. Yet the softer instruments in the back may be imbued with reflections but very little of the sound energy may actually bounce off the back wall. Using 2 reverbs helps in this situation.

Creating a "longer" reverb.

An old trick is to first run signals through a digital delay, then to the reverb. We used to have to do this because digital reverb times were shorter than they are today, but the trick still works. In fact, it has been done on so many recordings that it is a bit of a standard. Its just the thing for ambient type soundcapes and may be used to mask imperfect vocal performances, as the delay tends to help mask off pitch notes.

Advanced Texture Mix Tip

Ever wonder why some mixes just jump out at you? It seems like the sound is deep and wide and almost 3 dimensional. There's a number of ways to achieve that, some good, some bad. The most dramatic is reversing the phase on one channel of a stereo mix. Sound just leaps out, but there is a problem. Sum to mono and the whole image disappears, what we know as phase cancellation. Another way to do this is with a combination of a delay and pan controls. You hard pan the mix left and right and add a tiny, infinitesimal delay to one channel. I mean really tiny or the mix will get lopsided. Our ears, conditioned by thousands of years warding off wild animals, can appreciate subtle shifts in the direction a sound comes from. As you add the delay, listen for the sound to "open up". It will if you do this right. Just another thing you can do with simple pan controls.

Panning the Orchestra

There is no absolute way to create a sonic image of an orchestra, but it does make sense to follow a classic seating chart which helps create a balanced, uniform sonic image. Note in the example below, how frequency ranges of the instruments (i.e., how bassy, mid range or treble-like the instruments are) tend to avoid conflict. The Bass Drum is far from the double basses. Also note how they reinforce each other. The Cellos and Violas can play one part distinctly on the right while the violins play a different part of the left. When they all play together there is a pleasing wash of sound, sometimes called a "pad" in electronic lingo. Note that the woodwinds, perhaps the most melodic of the orchestra, are centered. As you go to the right, the sound goes from soft to hard, from sweetness to bratty trumpets and tubby tubas. As you go left, it gets more delicate, with soft horns, piano or harp. In the back, you have your short and louds, like Piatti (cymbal) Snare, Bass Drum and Timpani. In the front, you have the long and softs, the strings.

To pan your MIDI orchestra, 0 should be far left and 127 is far right. You rarely want to set any instrument to an extreme value. For example, Harp, might be set to 20, French Horn to 40, Flute to 60, Oboe to 70 and double basses to 110. The Front strings might be at 40 and the Celli at 89. Don't read these numbers as absolutes, they are just an estimate. Every piece of gear sounds a little different. While all synths have 128 theoretical pan values, many of these values do not do anything to the sound. Some only change the actual sonic position every 3, 7, 15 values, some even 31 values. So experiment, move things around "a little" and hopefully the sounds will fall into their pocket.

Tascam Gigastudio 3 Orchestra Sampling Software (Windows)

Less is Often More

Effects should be used minimally. If a stereo effect is so great that you can no longer pinpoint the instrument, you used too much. Another tip here is doubling and detuning. You can make any instrument dramatically wide, yet centered, by putting the same instrument far right (127) and far left (0) and slightly detuning them by about 5-7 cents. This is a great technique for "wall of sound" like mixes that has strings that appear to "float" on the mix. Use it sparingly though, as hard panned doubles can easily take up sonic space where other instruments need to go.

Its good advice to work up a mix without any effects and apply them sparingly in the final stages. After your ears become accustomed to hearing the "in your face" mix, you will notice that as you add effects the mix will become darker, muddier, and less defined. Again that is a sign that you are going overboard.

A Final Point

What i have hoped to show in this article is simply that conservative settings often play a role in strengthening a mix. You rarely have to pan anything 100%, you rarely have to max any one fader or effects send out. Just little bits of signal going to alternate audio paths goes along way towards giving you a breathtaking sonic image. 


Basic Music Mixing Panning Of Channels

This article is as basic as it gets. It's for someone who has never used a mixer and panned channels. In later articles we'll show you how to use two or three lead vocal tracks, how to pan them, delay them, etc. This article is the bare basics.

In the stereo field you have a left speaker and a right speaker. Panning a channel puts that sound somewhere within that field. If you pan a channel hard left (L90), you will hear the sound playing only out of the left speaker. Pan a channel center (C0) and you'll hear the sound coming from directly between the two speakers, right in the center.

Typically in music, certain instruments and sounds consistently appear in the same areas of the stereo field. Technically, you could pan things anywhere. But your goal is to pan instruments and vocals in common recognizable areas that leave space for each other. You could pan every instrument in the song dead center, but if you did, you'd have a train-wreck of noise all on top of each other. Each instrument needs to have its own space in the stereo field (and in the frequency field).

Back in the day, the Beatles panned their vocals hard left and the drums hard right in some of their songs. That wouldn't work today (or back then either). While listening on an Ipod, no one would want to hear a guy singing only in their left ear for an entire song. The industry quickly scrapped that panning experiment.

Here Are Your Basic Panning Starting Points

Note: C=Center, L=Left, R=Right

Lead Vocal - C0 (double and triple vocals are panned in multiple areas)

Snare - L5, or C0, or R5

Kick Drum - C0

Hi Hats / Wood Hit, Clicks, Snaps, Etc. - Between L35 to R35

Cymbals - Between L10 to R10

Bass Guitar - Between L10 to R10

Lead Guitar - Could be anywhere, but usually "at least" 20L or 20R off of center.

Keyboards, Piano, Horns, Violins - Between L80 to R80 or stereo (L90 and R90). All depend on the song and the arrangement. Many times these instruments are stereo, but in a full mix sometimes the piano or a horn is only on one side, around L45 or R45. Also, different musical melodies are sometimes played. One violin melody could be playing on the left while a different one is being played on the right. This will be explained in detail in our future "stereo field" and "music arranging" articles.

I never pan anything L90 or R90 (I'll go L80 or R80) unless its a stereo track whose material doesn't reach the very outer edges. Anything that is panned this hard sometimes is exaggerated when using an Ipod. The sound could be annoying and hot in one ear.

The best way to learn where instruments are panned is to listen to commercial artists whose music style is similar to yours. Listen to different songs and take notes on where the instruments appear in the stereo field. This will at least give you some idea of what's going on.

Note: When multiple vocals or stereo instrument tracks are playing it could be hard, if not impossible, to tell exactly where they are panned. In future articles, we will explain in detail different advanced panning techniques that will help you quickly decipher what's going on in your favorite artist's songs. Which means you can emulate these commercial panning techniques.